
 Hello, all!
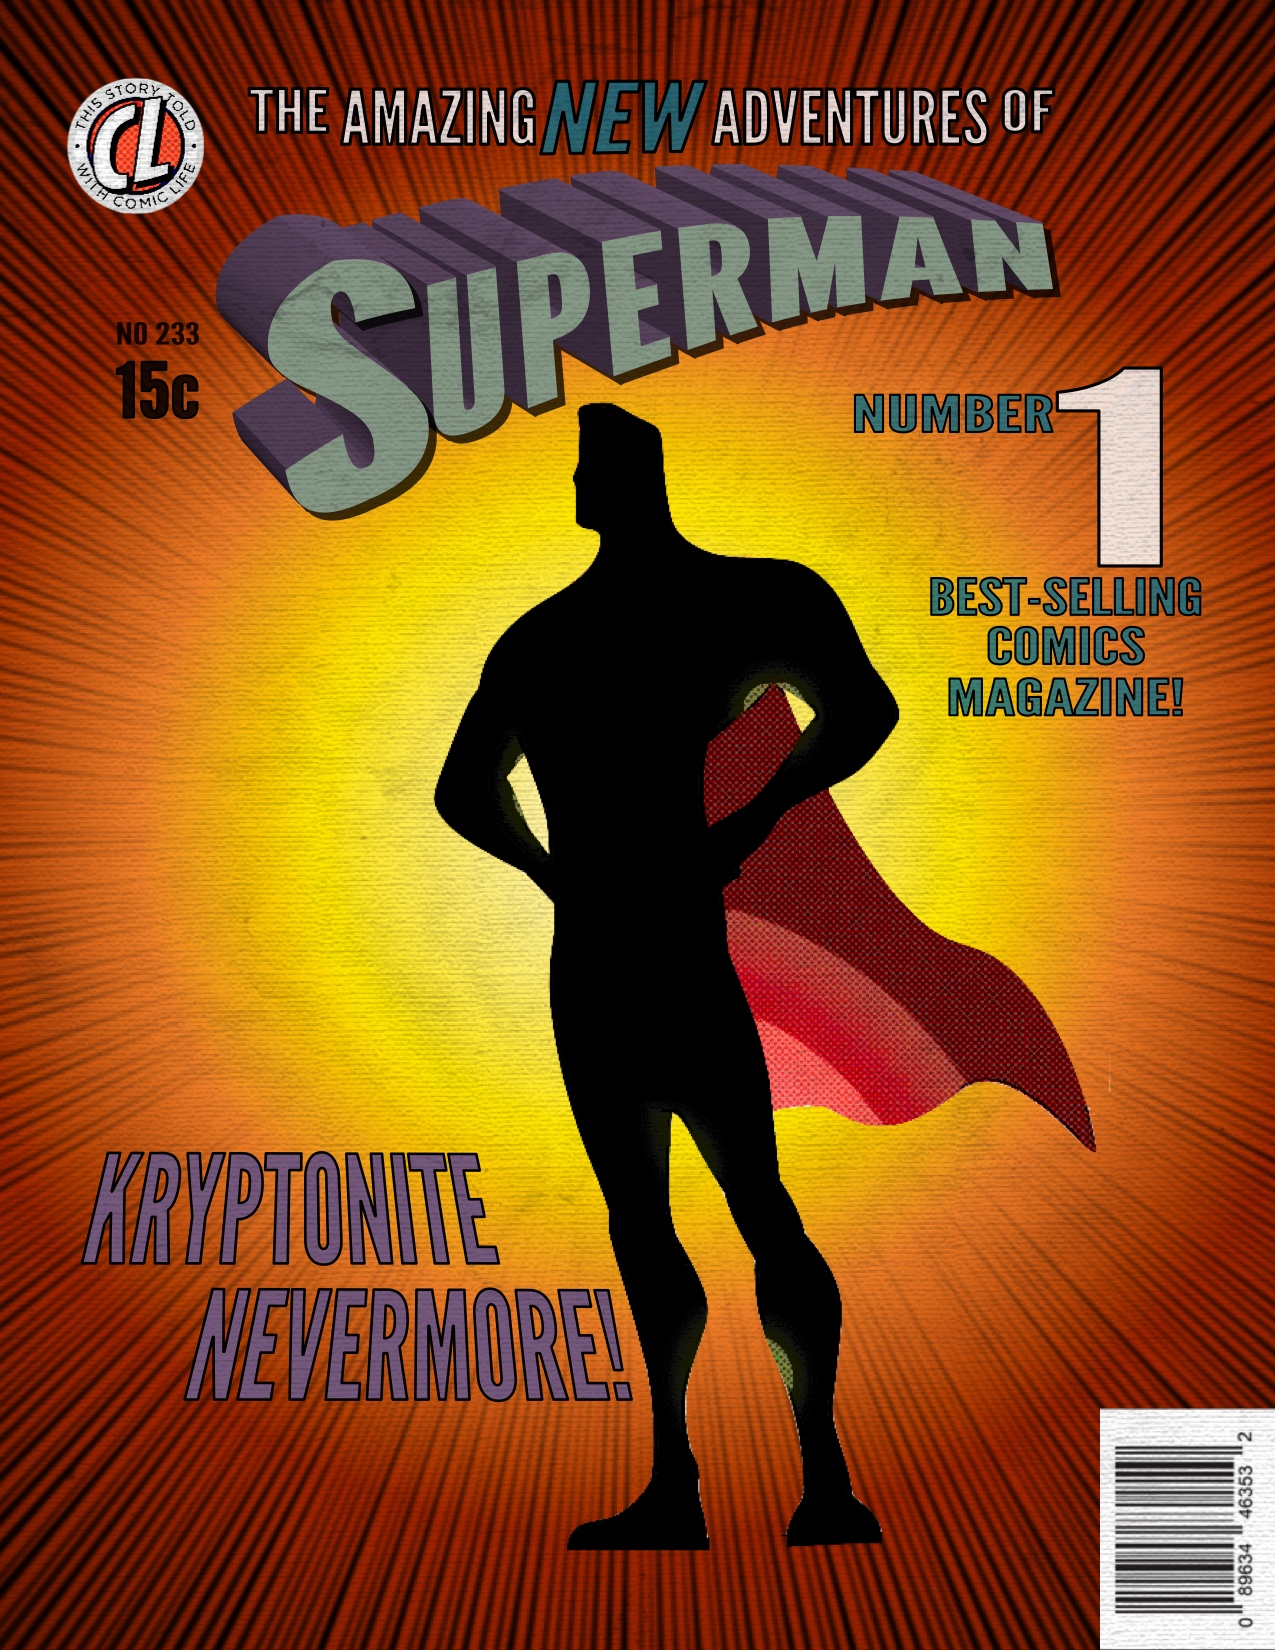
Today, my friends, we are going to learn about some of the cool graphics work you can do in Comic Life 3. See this cover to the right? That was built in Comic Life 3, inspired by the DC Superman Vol. 1 No. 233 cover. I’m going to walk you through who to build this cover too, ’cause it’s easy! You can also watch the video at the bottom of the post to see these steps in action.
1. Breaking down the comic elements
There are three basic parts to this comic: Lettering, Fill and Filter. All of the words are variations on the same lettering style with different fill colors. The background makes use of our built in speedlines and gradient builder. And the image is a placeholder image we have, with a filter.
2. To Template or Not To Template?
One of my favorite templates is the “Future” template, so I decided to use that as my base for this comic. The design of this template puts a texture to the page that makes it look like an older paper. You can built this comic cover from scratch very easily, so for those of you who want to start clean, use the “Blank” template.
3. Image Placement and Transparency
To get started I like to get my image in place, that way I know what kind of space I have to work with for my lettering.
Drag and drop your preferred image into place and add a filter. To get the full effect of the speedlines showing behind the image you will need to use the Instant Alpha tool to knock out the background of your image. It’s super easy: select your photo, click the Instant Alpha icon in the menu and then click and drag on your image to select the portions you want to knock out.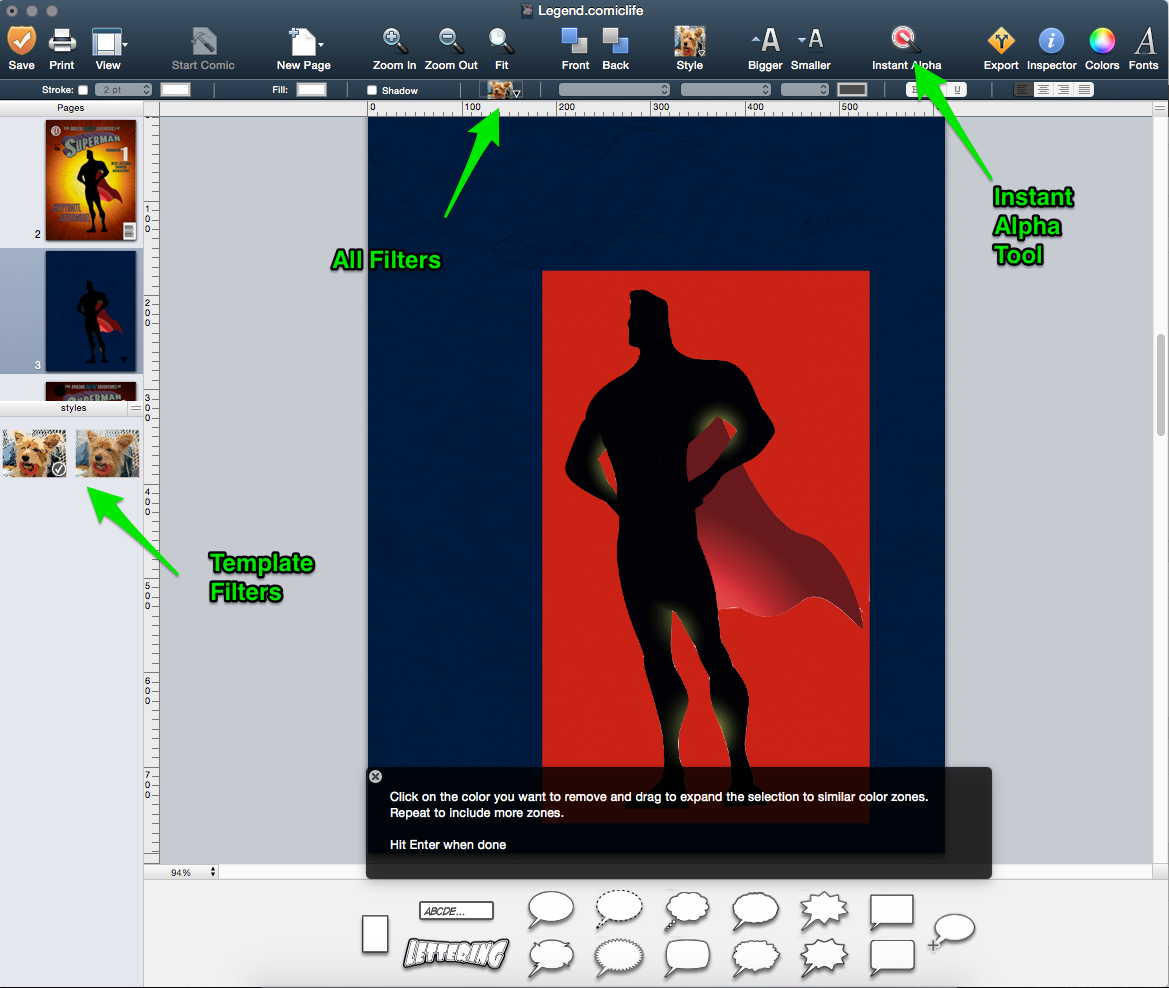
Here is a full post about using Instant Alpha if you are unfamiliar with how it works in Comic Life 3. Note: the more uniform the background the easier it is to knock out.
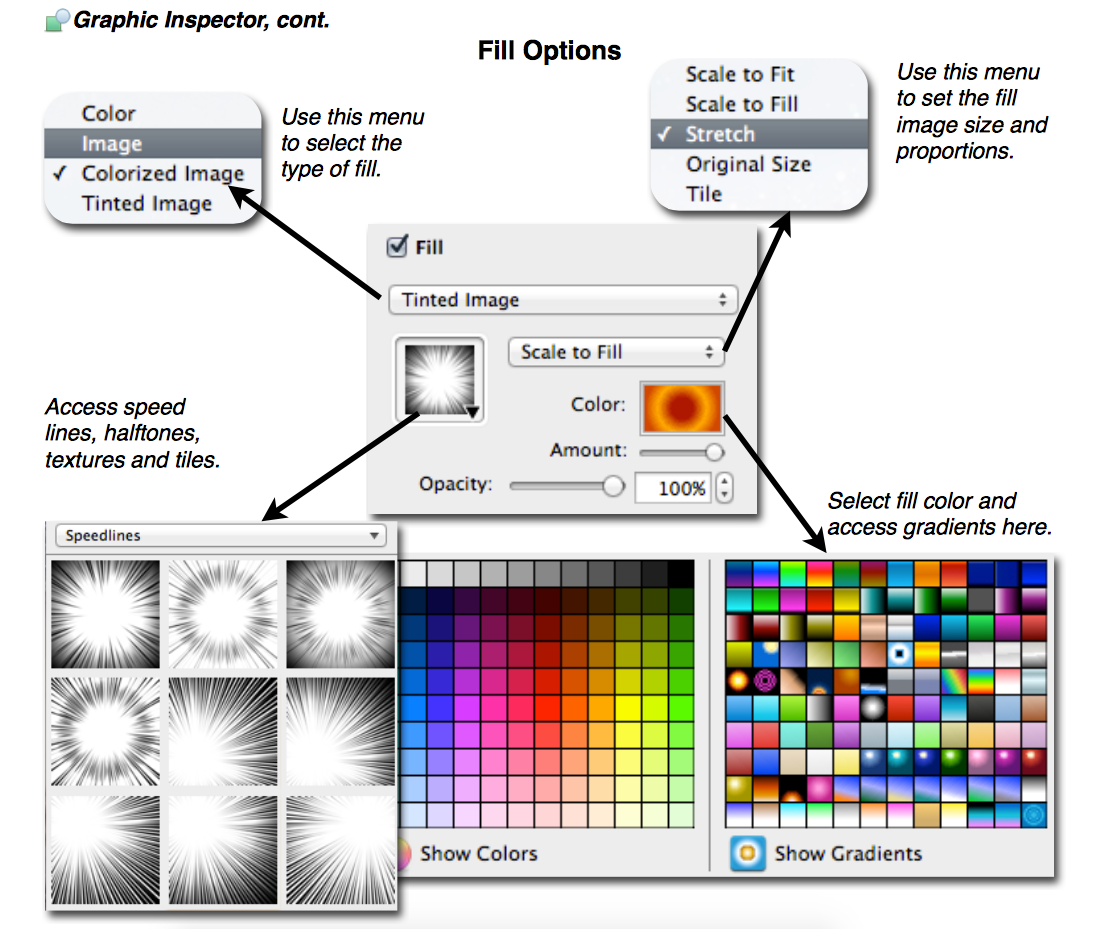
4. Using the Image Fill Option
Now that your image background is transparent you can use the Inspector to create a dynamic background. The Inspector is your best friend for getting to the powerful editing tools in Comic Life 3. Our Getting Started Guide has a whole section on what you can find in the Inspector (p. 9-16). For building this background we are going to use the Fill Options. Selecting “Tinted Image” then choosing “Speedlines” from the image dropdown menu. Be sure that the image is se to “Scale to Fill”. Next we set the color by building a gradient or using one that’s already built in.
Excerpt from the Getting Started Guide.
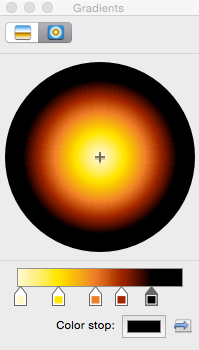 I used a built in gradient and then modified it by dragging the color stop to new locations. You can change the color of a color stop by clicking on it and then clicking on the box next to “Color stop:”. This will reveal the color picker. You can also add color stops by double clicking on the gradient line.
5. Modifying Lettering
At this point you’re down to the lettering. In Comic Life you can create and save your own styles for all of your comic elements. This comes in handy when you are going to be using the same type of lettering in multiple places.
Whenever you add lettering it will appear in the default style. You can make your changes using the Inspector or options in the toolbar or using the Inspector.
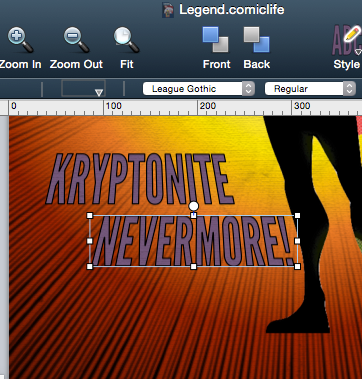
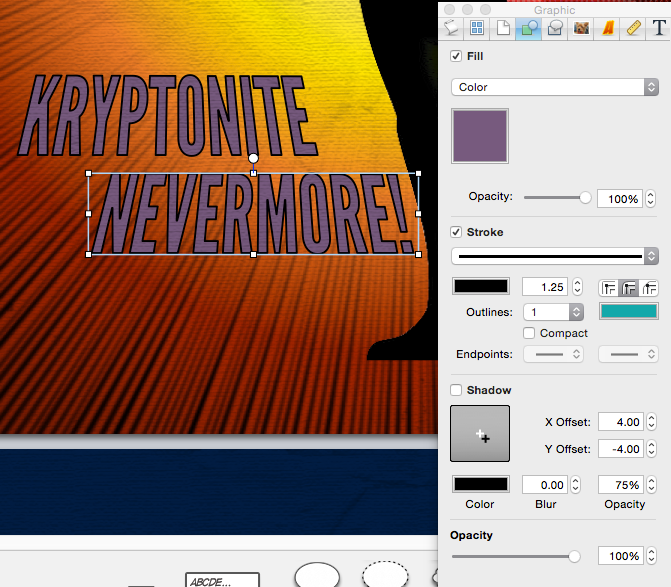
I like to use the tool bar to set the font. You can access some of the most popular comic fonts in the dropdown menu. And then I use the inspector to get the details of fill, stoke and shadow set.
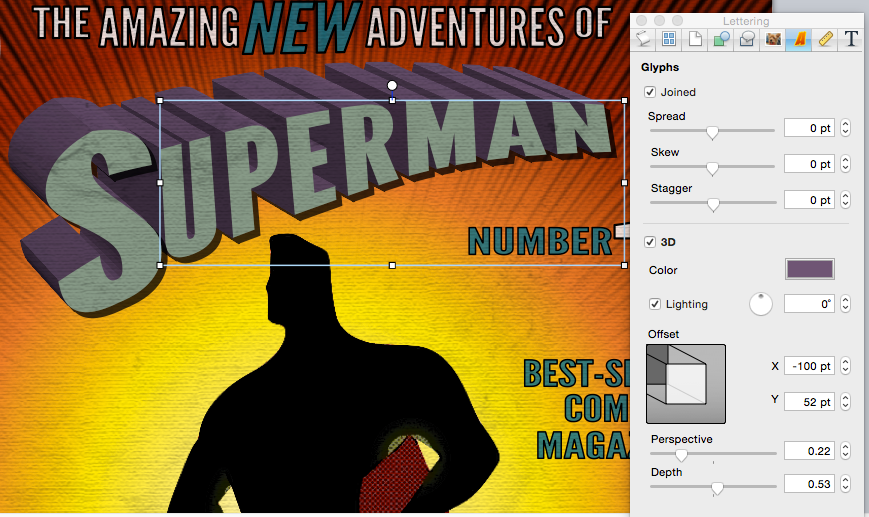
If you want to give your lettering the 3D effect click on the lettering tab in the Inspector – the tab that has the orange A. You can set the depth and perspective of the 3D effect using the slide bars. If you want to change the color of the 3D fill just click on the color stop in the Lettering Inspector tab.
6. Saving and Updating Your Styles
Once you have created a style that you like, you can save it in the style well on the left of your screen. This works for any element (lettering, balloons, captions, shapes, images, etc…). When you select an element the corresponding style of that element will be selected in the style well.  You will see a little check icon appear next to that style
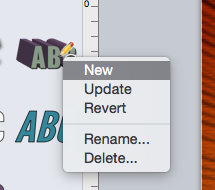 . If you want to modify this style make changes to your element on the comic page and then click on the check icon, this will present you with the style modification options. You can either create a whole new style by selecting “New”, update the style you’ve been working with by selecting “Update” or discard all of your changes and return your element to it’s original style by selecting “Revert”. You can also rename and delete styles for organizational purposes.
Here’s a video walking through all of the steps above.
Please note that all DC Characters and the distinctive likeness(es) thereof are Trademarks & Copyright © 1948 – 2005 DC Comics, Inc. and used without permission. ALL RIGHTS RESERVED.