
Hello there!
 Ever since we introduced the Script Editor in Comic Life 3 we’ve heard nothing but excitement about students being able to do all of their writing before getting started on their comic. Now that Comic Life 3 has been out for a year and we are visiting with you wonderful educators again at BETT and TCEA we have been hearing that the Script Editor might be getting missed when creating lessons.
I wrote about our approach to script writing in the classroom before, but we haven’t done a full post on how to use the Script Editor. I think it’s high time we do, so here we go!
1. Locating the Script Editor or starting with a script template.
Wh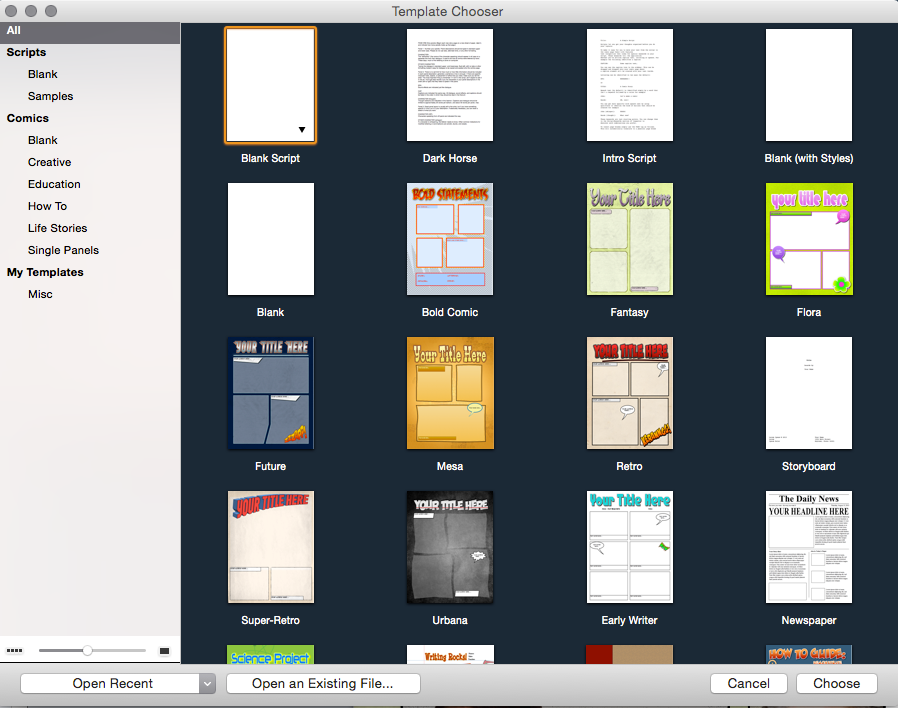 en you launch Comic Life you are presented with the Template Chooser. If you’re looking at All Templates the first three templates are going to get you started with just the Script Editor features and none of the page layout templates.
There are three script templates. The “Blank Script” is a blank page, ready for you to start your creation. The “Dark Horse” script template tells you about comic writing conventions and how to indicate comic elements in your script. The “Intro Script” is an example script so you can see how Comic Life 3 recognizes what you type in the Script Editor and reflects the elements in the bar on the lefthand side. (I’ll explain what that means in the next step.)
2. Understanding Keywords in the Script Editor
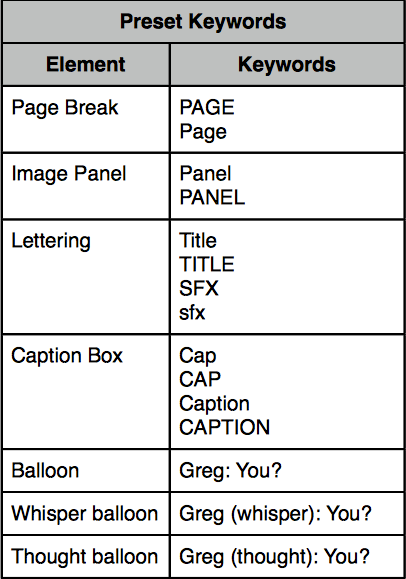 The script Editor works by recognizing Keywords and providing you the correct elements to drag and drop onto the comic page. There are some preset Keywords built into Comic Life to make it easy to get started, shown in the chart. To use a Keyword simply type it into the Script Editor and you will see the corresponding element icon appear next to the text.
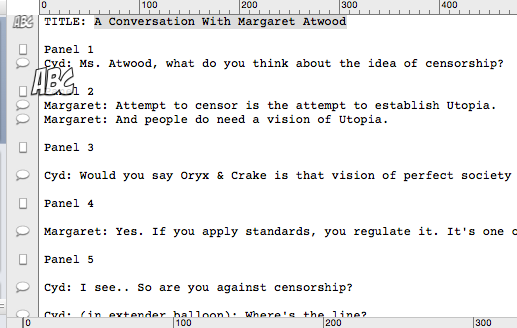
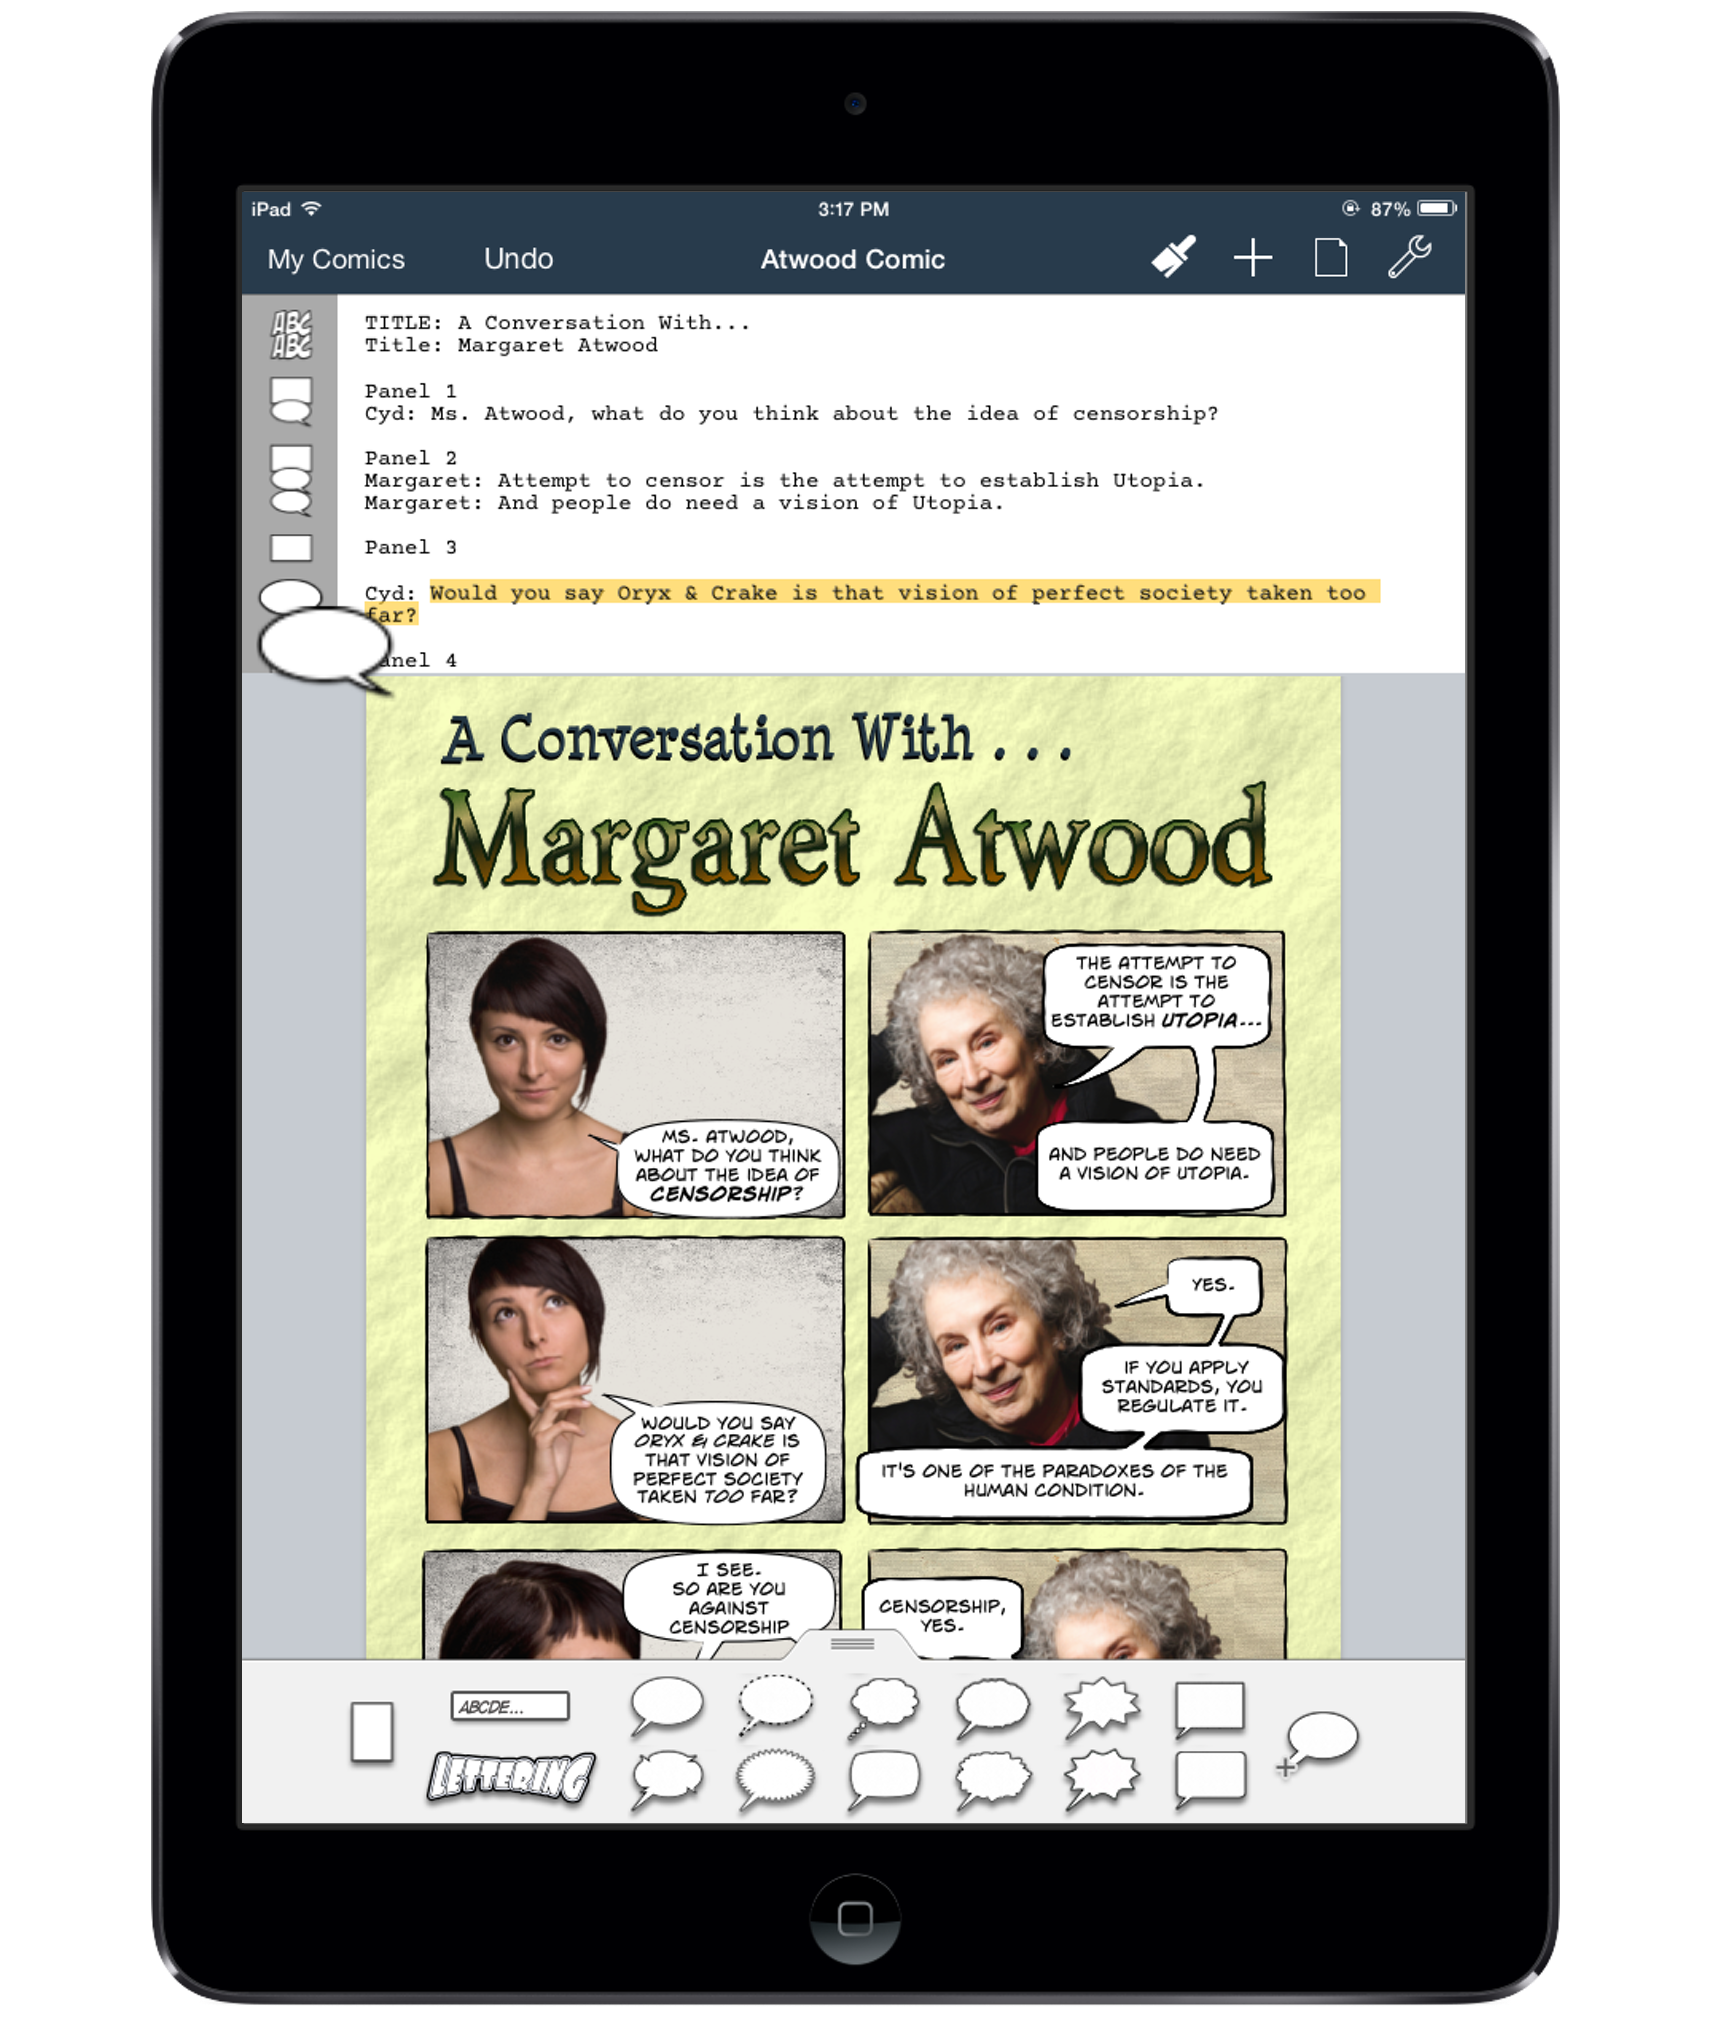
This is an example of what a script looks like using Keywords. Note that there is a colon (:) after each Keyword as an indicator for the command.
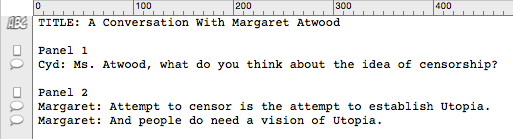
As you type the Keyword and colon you will see corresponding element appear to the left of the Keyword. Default balloons are indicated by any word (except those keywords designated for other elements) followed by a colon. You do not have to manually enter in your character names.
4. Moving from the Script Editor to the Comic Editor
![]() Now that you have finished typing your script using Keywords you can click on the “Start Comic” icon in the toolbar. This will present you with the template chooser again. Select a template or blank page to get started. Once you’ve selected a template you will see that your script is in the top portion of your screen and the comic template is beneath it. For the purposes of this guide we are going to be working with a blank template that I have updated with some custom styles.
Now that you have finished typing your script using Keywords you can click on the “Start Comic” icon in the toolbar. This will present you with the template chooser again. Select a template or blank page to get started. Once you’ve selected a template you will see that your script is in the top portion of your screen and the comic template is beneath it. For the purposes of this guide we are going to be working with a blank template that I have updated with some custom styles.
5. What to do in the Comic Editor
Now that you have your script and the comic page up you are ready to start dragging and dropping. Click and drag the elements from the bar next to your script to start building your page. Check out this video showing how the drag and drop works.
Direct link to the video: Script Editor: Drag and Drop
NOTE: This works the same way for the iPad as well. Tap, drag and drop from your script right onto the comic page.
6. Off you go!
Drag and drop your elements from the Script Editor. Resize and reshape your balloons as needed.